How to Clean Hockey Gloves: Remove Odor & Disinfect
When it comes to maintaining your hockey gear, knowing how to clean hockey gloves effectively is essential not only for hygiene but also to prolong their life. Hockey gloves are an integral part of your gear, protecting your hands from injuries during the game. However, they are also prone to accumulating sweat, dirt, and bacteria, leading to unpleasant odors and potential health risks. This guide will take you through the importance of keeping your hockey gloves clean and highlight common problems faced by hockey players, such as odor and bacteria buildup.
Understanding the Causes of Odor and Bacteria in Hockey Gloves
The primary reason hockey gloves begin to smell is due to the accumulation of sweat, dirt, and bacteria. As you play, your hands sweat, and without proper ventilation and cleaning, this moisture becomes a breeding ground for bacteria and fungi. These microorganisms are responsible for the unpleasant odor and can also pose significant health risks if not addressed properly.
Sweat and Moisture
Sweat is the most significant contributor to odor in hockey gloves. The moisture creates an ideal environment for bacteria and fungi to thrive, which in turn break down sweat into malodorous compounds.
Dirt and Debris
Playing hockey involves contact with various surfaces that can introduce dirt and debris into your gloves. This accumulation not only adds to the unpleasant smell but can also degrade the material of your gloves over time.
Bacteria and Fungi
The warm, moist environment inside hockey gloves is perfect for the growth of bacteria and fungi. These microorganisms are the primary culprits behind the bad smell and can also lead to skin infections if the gloves are not cleaned regularly.
Addressing the Issue
Understanding that the issue is not just about the odor but also about the health risks associated with bacteria and fungi is crucial. It's important to clean your hockey gloves regularly to eliminate these microorganisms, ensuring your gloves remain fresh, hygienic, and in good condition. Proper cleaning and maintenance not only extend the life of your hockey gloves but also protect your hands from potential infections, making the cleaning process an integral part of your hockey gear care routine.
In conclusion, regular cleaning and maintenance of hockey gloves are vital for both hygiene and durability. Recognizing the causes of odor and bacteria buildup is the first step in addressing this issue. By following the right cleaning procedures, you can ensure your hockey gloves remain in top condition, allowing you to focus on your performance without worrying about the negative effects of sweat, dirt, and microorganisms.
How to Clean Hockey Gloves: Remove Odor & Disinfect
3. Pre-Cleaning Steps
Before diving into how to clean hockey gloves, it's crucial to prepare them properly to ensure a thorough cleaning without causing any damage. Pre-cleaning involves inspection and preparation of both the gloves and the cleaning area.
Inspection
- Check for Damage: Begin by inspecting your hockey gloves for any rips, tears, or areas that may require special attention during the cleaning process. Identifying these areas ensures that you don't exacerbate any existing damage.
- Identify Problem Areas: Look for spots with excessive dirt or odor. These areas might need extra cleaning effort.
- Assess Ventilation: Ensure the gloves' ventilation holes are not blocked by dirt or debris, as this could hinder the drying process post-cleaning.
Preparation
- Workspace: Choose a clean, flat surface to work on. Covering the surface with a towel or a waterproof mat can help absorb excess water and prevent messes.
- Gloves: If your hockey gloves have any removable parts, such as padding, take them out if possible. This allows for a more thorough cleaning of both the gloves and the removable parts.
- Personal Preparation: Consider wearing disposable gloves, especially if your hockey gloves are heavily soiled. This protects your hands from coming into direct contact with dirt and bacteria.
4. Materials Needed

Having the right materials on hand is essential for effectively cleaning your hockey gloves. Here’s a list of materials you’ll need:
- Mild Detergent: Choose a gentle, non-abrasive detergent that won’t damage the gloves' material.
- Soft Brush: A soft-bristled brush or an old toothbrush helps to remove dirt and grime without scratching the gloves.
- Clean Cloths: Soft, absorbent cloths are necessary for wiping down the gloves and helping with the drying process.
- Lukewarm Water: Prepare a basin or a bucket with lukewarm water for soaking and rinsing the gloves.
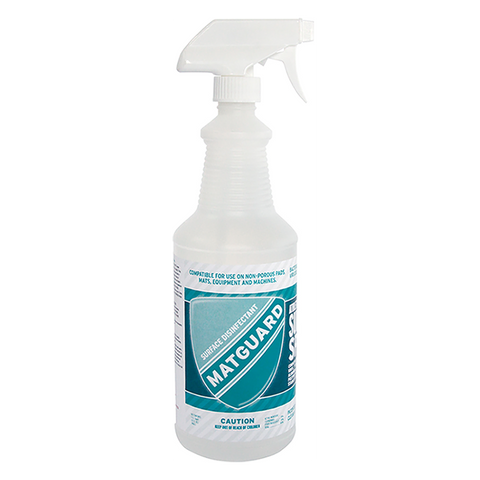
- Disinfectant Spray (e.g., Matguard Disinfectant Spray): A sports gear-friendly disinfectant spray helps eliminate bacteria and odors without harming the glove's material.
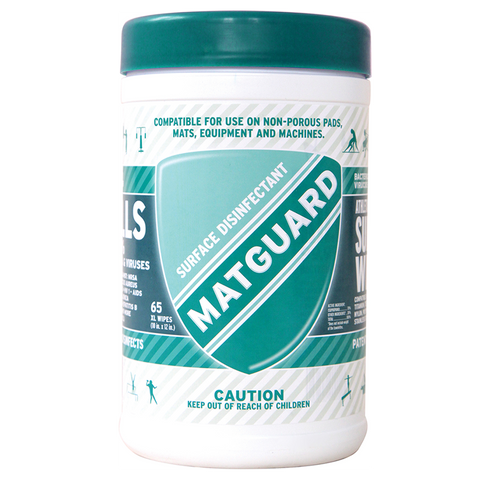
- Disinfectant Wipes (e.g., Matguard Disinfectant Wipes): These are handy for quick touch-ups or for cleaning areas that are difficult to reach with a spray.
By following these pre-cleaning steps and gathering the necessary materials, you're well-prepared to tackle the task of cleaning your hockey gloves. Not only does this process help in removing odor and disinfecting the gloves, but it also contributes to extending their lifespan, ensuring you get the best performance out of your hockey gear.
How to Clean Hockey Gloves: Remove Odor & Disinfect
5. Step-by-Step Guide to Cleaning Hockey Gloves
Cleaning hockey gloves properly is crucial for maintaining hygiene and ensuring their longevity. Follow this detailed guide on how to clean hockey gloves to remove odor and disinfect them effectively.
Step 1: Dry Brushing
Objective: Remove loose dirt and debris.
Process: Before wetting the gloves, use a soft brush or an old toothbrush to gently brush away any surface dirt, dust, and debris. Pay special attention to crevices and the areas between fingers where dirt tends to accumulate.
Step 2: Washing
Objective: Gently wash the gloves to remove dirt and sweat.
Process:
- Fill a basin with lukewarm water and add a small amount of mild detergent. Avoid using hot water as it can damage the gloves' material.
- Submerge the gloves in the water and gently scrub them using your hands or a soft brush. For areas with heavy buildup, you may need to apply more focused effort.
- If available, use a small amount of Matguard Disinfectant Spray directly on heavily soiled areas before scrubbing. This helps in breaking down the dirt and makes the cleaning process more efficient.
Step 3: Disinfecting
Objective: Eliminate bacteria and fungus.
Process: After washing, apply a sports gear-friendly disinfectant like Matguard Disinfectant Spray evenly over the gloves, both inside and out. Ensure the product is suitable for use on sports equipment and follow the manufacturer’s instructions for application and wait time to maximize the disinfecting effect.
Step 4: Rinsing
Objective: Ensure no residue is left behind.
Process: Rinse the gloves thoroughly under lukewarm running water to remove any soap and disinfectant residue. Make sure to open the gloves as much as possible to allow the water to flow through all parts of the gloves, ensuring a thorough rinse.
6. Drying Techniques
Proper drying is as important as cleaning to prevent mold and mildew growth and to ensure the gloves maintain their shape and integrity.
- Air Drying: The best method for drying hockey gloves is to let them air dry. Place them in a well-ventilated area away from direct sunlight and open them up as much as possible to allow air circulation inside and out.
- Avoid Direct Heat: Never use direct heat sources like hair dryers, radiators, or direct sunlight to speed up the drying process. High heat can damage the material, affecting the gloves' fit and protective qualities.
- Positioning: If possible, hang the gloves with fingers pointing downwards to allow water to drip out and speed up the drying process.
7. Post-Cleaning Care
After learning how to clean hockey gloves, it's important to understand the steps for post-cleaning care. Proper care extends the life of your gloves and keeps them ready for your next game.
Deodorizing
- Charcoal Sachets: Place charcoal sachets inside the gloves when not in use. Charcoal naturally absorbs odors and moisture, keeping the gloves fresher for longer.
- Essential Oils: A few drops of essential oils (like lavender or tea tree oil) on a small cloth tucked inside each glove can help maintain a pleasant smell. These oils also possess natural antibacterial properties.
- Regular Air-Out: Simply airing out your gloves in a well-ventilated area after each use can significantly reduce odor buildup.
Storage
- Dry Environment: Store your hockey gloves in a cool, dry place to prevent the growth of mold and mildew. High humidity environments promote bacterial growth and can reintroduce unpleasant smells.
- Avoid Tight Spaces: Don't cram your gloves into tightly packed sports bags or lockers for long periods. Instead, hang them up or place them in a breathable mesh bag if they must be stored in a sports bag.
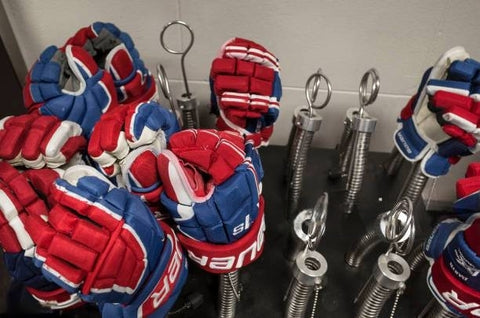
- Use a Glove Stand: A glove stand can help maintain the shape of the gloves and promote airflow through them, speeding up drying time and preventing odor accumulation. Check out our entire guide on storing sports equipment.
8. When to Clean Your Hockey Gloves
The frequency of cleaning depends on usage, but here are some general guidelines to maintain hygiene and durability:
- Regular Players: If you play regularly (several times a week), consider washing your gloves every 2-4 weeks to prevent bacteria and odor buildup.
- Occasional Players: For those who play less frequently, cleaning your gloves every 1-2 months might be sufficient.
- Visible Dirt or Odor: Anytime the gloves start to show visible dirt or develop an odor, it's time for a clean, regardless of the last cleaning time.
After Illness: Clean your gloves immediately if you've been sick to prevent the spread of germs.
9. Professional Cleaning Options
While most players can effectively clean their hockey gloves at home, certain situations might call for professional cleaning:
- Deep Cleaning: If the gloves have not been cleaned for an extended period and have significant dirt and odor buildup, a professional cleaning service can provide a more thorough cleaning.
- Sensitive Materials: Some gloves made from delicate materials might require specialized cleaning techniques that professional services offer.
- Convenience: Players who lack the time or facilities to clean their gloves thoroughly may opt for professional cleaning for convenience.
Professional cleaners use specialized equipment and products to not only clean but also disinfect and deodorize hockey gloves, ensuring they are in optimal condition for use. Always ensure the cleaning service is experienced with sports equipment to avoid any damage to your gloves.
Understanding how to clean hockey gloves and following through with regular cleaning, proper post-cleaning care, and timely professional services when necessary, will help maintain your gloves in peak condition, ensuring longevity and hygiene.
10. Conclusion
Learning how to clean hockey gloves is essential for any player looking to maintain their gear in top condition. Throughout this guide, we've covered the importance of regular cleaning and disinfecting to remove odor, prevent bacteria buildup, and extend the life of your gloves. Key steps include pre-cleaning inspection, choosing the right materials for cleaning, following a step-by-step guide for washing and disinfecting, and employing proper drying techniques. Additionally, post-cleaning care through deodorizing and correct storage plays a vital role in keeping your gloves fresh between cleanings.
Regular cleaning not only ensures your gloves remain hygienic and odor-free but also contributes to a safer and more pleasant playing environment. By incorporating these practices into your routine, you can enjoy the game without the distractions of uncomfortable or smelly gear.
11. FAQs on How to Clean Hockey Gloves
Can I machine wash hockey gloves?
While hand washing is generally recommended to prevent damage, some gloves are designed to be machine washable. Always check the manufacturer’s instructions before proceeding. If machine washing is permitted, use a gentle cycle with cold water and a mild detergent. Place the gloves in a garment bag to protect them and other items in the wash.
How do I clean very sensitive materials?
For gloves made of sensitive materials, such as certain leathers or synthetic fabrics, opt for a gentle, non-abrasive cleaner and avoid harsh chemicals. Use a soft cloth or sponge to apply a small amount of cleaner, and gently dab the area rather than scrubbing. Always test a small, inconspicuous area first to ensure there's no adverse reaction.
Can I use bleach to disinfect my hockey gloves?
It's generally advised to avoid using bleach on hockey gloves as it can damage the materials and alter colors. Instead, opt for sports gear-friendly disinfectant sprays or wipes, such as Matguard Disinfectant Spray or Disinfectant Wipes, designed to kill bacteria and viruses without harming the fabric.
How can I prevent the gloves from shrinking during the drying process?
To prevent shrinking, never expose hockey gloves to direct heat sources like dryers or radiators. Instead, allow them to air dry naturally in a well-ventilated area. You can also periodically stretch and flex the gloves gently during the drying process to maintain their shape and size.
By addressing these frequently asked questions and following the detailed guide on how to clean hockey gloves, you’re equipped with the knowledge to keep your gear in pristine condition, ensuring longevity and a better experience on the ice.